Creating a Google Plus page for your business may sound like just one more task to mess with, but it actually comes with specific advantages. For example, Google provides a number of tools for connecting your site to your Google Plus account, which has been shown to improve search engine rankings. Plus (pun intended), it’s easy to connect your other social media accounts to it so that when you post on one, the same posts automatically show up on Google Plus. You can learn more about how to do that on Maximize Your Social Media Marketing Efforts. But before we get to that, your real challenge is just in setting up the account in the first place, which is what I am going to walk you through today.
Another point to consider – when you have your own business, it is important that you stay involved in social media, and I don’t mean just one site either. There are millions of people in areas all around the world who happen to log onto social media platforms on a daily basis, and everyone has their favorite. As a business owner, you are responsible for using social media to interact with consumers and potential customers as a way of spreading the word about what you have to offer and getting people interested in what you are selling. Your customers probably do not all frequent the same social media sites, so the more platforms you are involved in, the better you will keep up with ALL of your customers. It’s simple for you to create a Google Plus business page, and in only a matter of minutes, you can start socializing with consumers who prefer this social media platform.
Before you can get started, you’re going to need a Google account. So head on over to Gmail.com and set that up if you haven’t already. It just takes a few minutes.
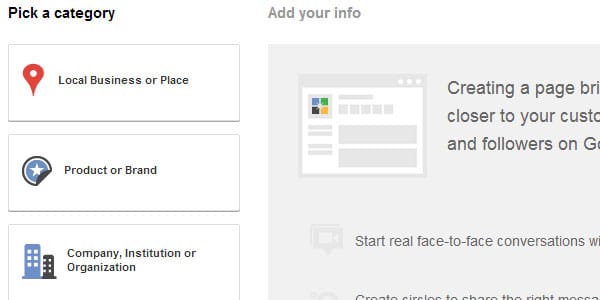
Next, visit the Google Plus website at www.plus.google.com. Once you visit the website, you will click on the link that tells you to create a page. After clicking the link, you will notice there is a selection of categories to choose from. The selection of categories is important since it basically represents what your business is about. Some of the categories include local businesses, products or brands, companies or organizations, arts & entertainment, and others. Choose the category that best fits your particular business. After selecting a category, you can begin with the customization of your profile.
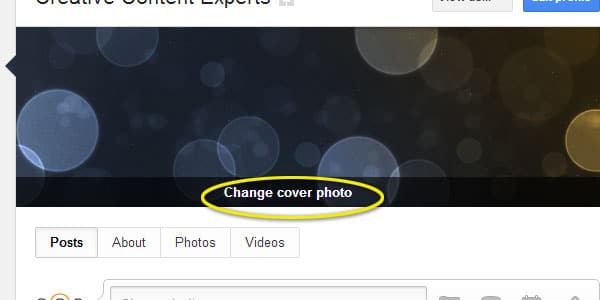
You have two main image sections on Google Plus – the profile photo and cover photo. The profile photo is the smaller image off to the side. The cover photo is the large image across the top.
Put your company logo in the profile photo slot. This image shows up anywhere you make a post, and you want your logo in front of customers all the time. The cover photo can be just about anything – a screenshot of your website, a picture of your store, or even a promotional image telling customers about a sale.
To change any of these photos, simply hover your mouse over the images while logged in and select the change picture option. You’ll be able to upload images and crop/move them around to get them looking just right. If you really want to get fancy, check out these instructions on Customizing Your Google+ Page To Match Your Brand.
After uploading pictures, you need to type in information about your business. Start off with an introduction and be sure to provide viewers with the information they are going to want to know about your business.
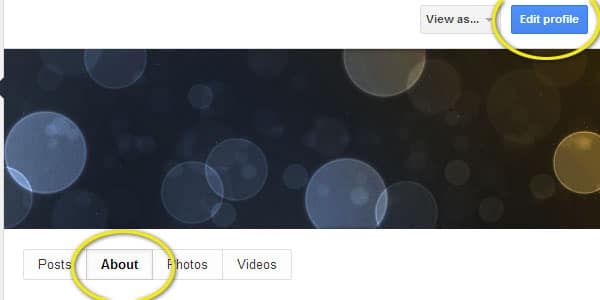
To edit or add this information, click the “Edit profile” button and select the “About” link on your profile. Then you can click on any section you want to edit and start adding information.
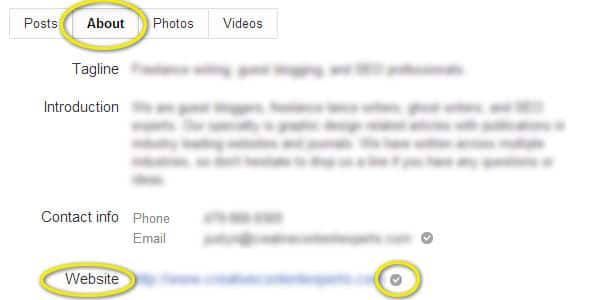
The primary piece of information to get right is the Introduction. Make sure the link to your site is in this area along with any contact information you want to include. It’s critical that your information is in this section because it’s often the first thing people see.
If you want to link your Google Plus profile with your site, it just takes a few minutes. You may need to work with your webmaster since a little bit of HTML coding is necessary, but if you’re comfortable with the basics this task is very straightforward.
First, add your website URL in the “Website” area on the About page. Don’t put it in the “Links” area or you won’t be able to link the accounts. I know it’s a bit counter-intuitive.
Now, copy the URL of your About page. It should look something like this:
https://plus.google.com/{your Page ID}
Next, use the following code and paste your Page ID into it:
<link href="https://plus.google.com/{+PageId}" rel="publisher" />The last step is to paste this
<link />information into the <head> section of your website. Even if you don’t have access to this, sending your webmaster the completed information will mean it’s a lot easier and faster for him to set it up for you.Once added to the <head> section of your site, you’re done! Google will verify your account and put a checkmark next to your link showing that the Google Plus Page is the official page.
On Google Plus, the fans are referred to as people in Circles. You add individuals who have Google Plus profiles of their own to various Circles, such as vendors, customers, or however you’d like to set it up. The advantage of creating unique Circles is that you can send posts to only select groups at once. So if you have a sale, you might want to only send a post to current customers. If you have an update to your account process, you might want to only send to your vendors.
Once you have information displayed on your Google Plus business page and also have profile pictures uploaded, you can start socializing with others. Fans of your business page will be able to follow you and in return, you can follow them back, showing them that you appreciate their support for your business.
While you may have already set up your Google Plus business page, you can continue to enhance the page by uploading pictures of your business and/or the different products that you have to offer. Google Plus also enables you to place people in circles, which means you can place customers in a specific circle while placing your business partners in a different circle. Make sure after creating your Google Plus page, you stay active and communicate with consumers so that you can increase business and gain new customers.
The emergence of affordable fiber internet packages has reignited a spark of excitement about home…
With technology dominating every aspect of people’s lives, digital security is not just an option…
Powered by increasingly sophisticated photo booth applications and fueled by our relentless craving to document…
Think of a world-class athlete training for the Olympics. They spend countless hours honing their…
In the swiftly advancing domain of B2B digital marketing, the significance of B2B SEO as…
Conveyor rollers play a central role in the efficient operation of numerous types of material…