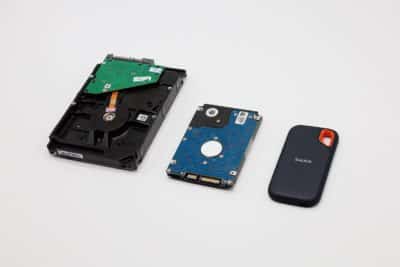
Disk imaging has become one of the most popular methods for backing up a hard drive. It doesn’t matter if you’re working with enterprise-level servers or consumer-grade drives, disk imaging is beneficial to nearly every computer user – as long as it’s used correctly.
IMAGE: PIXABAY
Automated Backups
If your disk imaging software allows for it, you should always take advantage of automated backups. For even greater benefit, try to schedule these backups to occur when you’re not using your computer. In an enterprise setting, this is easily achieved by scheduling backups for a business’ off-hours.
At home, most users schedule their disk imaging software to run in the middle of the night. In either case, make sure the backup isn’t happening while you – or someone else – is actively using the system in question.
Storing Disk Images
Many users go through all the trouble of disk imaging just to store their images on their primary, working hard drive. Unfortunately, this defeats the purpose of disk imaging in the first place. If something happens to your hard drive, you might not be able to recover the disk image at all – meaning you’ll still lose out on all of your valuable data.
Instead, make sure to store your disk images on a separate drive or on removable media. Depending on the size of the hard drive, rewriteable CDs, DVDs, or Blu-Rays are an excellent choice. USB thumb drives and external hard drives are also great alternatives.
You might even consider storing your backup in an off-site location, either physically or virtually. This ensures that your data is protected even in the case of a fire, natural disaster, or some other emergency at your home or place of business.
Securing Your Disk Images
Depending on the data that is stored within your disk image, you might want to consider securing it against unauthorized users. Encryption and compression are both great choices, and the latter can even reduce the overall size of your disk image. In either case, make sure your data is protected behind a strong password that isn’t easy for someone to guess.
Choosing The Right Files
In some cases, you might not require a disk image of an entire hard drive. Files that are available elsewhere, such as an installation disk, don’t necessarily need to be included in your disk image. Excluding these files from the backup not only makes the whole process quicker, but it results in a smaller image file, too. To make it easier, try to split your files onto separate drives if possible. For example, one drive can be used for operating system files while the other is reserved exclusively for critical data.
Although you’ll still want to make a disk image of both drives, you won’t have to update the image that contains your system files as often as the other. Depending on how much data you’re archiving, this could be a real timesaver when it comes to creating the disk images on a daily, weekly, or monthly basis.
If you are interested in even more technology-related articles and information from us here at Bit Rebels, then we have a lot to choose from.


COMMENTS