The power of artificial intelligence has never helped create exemplary visuals as much. The new CapCut Desktop is a radical approach to design since you are able to create pictures instantly with the aid of words. It creates any idea with its AI image generator, and it can be applied to social media, marketing, or a personal project. It is a tool that allows one to produce quality and realistic images in a few minutes, even when one is not a professional designer.
In this article, you will get familiarized with the essentials of CapCut and a straightforward step-by-step tutorial that will allow you to create your own custom AI photo.
IMAGE: CAPCUT
Why Use CapCut Desktop For AI Image Generation
In CapCut Desktop, it is easy to create content through the combination of the use of strong AI and easy editing potential within one platform. You can design, personalize, and optimize images without switching between applications. It is quick, easy to use, and anyone can be a creator, be it a novice or a pro. CapCut is the most fitting application for creating wide-ranging, quality images, as it allows creating background-free, AI-generated images and even converting images to videos.
Key Features Of CapCut’s AI Image Generator
Best AI image generator from text: CapCut has an in-built AI image generator that is able to turn your ideas into real images in a couple of seconds. All you have to do is type what you desire to view, i.e,. a warm cup of coffee in a warmly lit cozy shop with wooden furniture, and the artificial intelligence is created to produce life-like pictures. You may also be able to upload a reference image and match it to your preferred tone of color or composition to give more acceptable results.
Multiple AI models for any style: CapCut has a range of AI models, which include Image 4.0 (Seedream 4.0), 3.1, 3.0, and 2.0 Pro, and include various degrees of creativity and detail. Image 4.0 offers ultra-realistic images, whereas 3.1 and 3.0 are suited towards artistic and stylized images. Image 2.0 Pro is used in quick concept designs.
Easy editing for generated images: This is because, after generating an image, you can make some final touches within CapCut. Photo editing, lighting controls, color correction, cropping, and filters none of them require a third-party app. The editor allows you to do all the additions needed to improve your images in a single place.
Transform images into videos: CapCut also allows transforming AI-generated images into animated videos. You have the option to add text, motion, and music to make your images more dynamic – ideal in reels and stories, and in the case of promoting your product.
How To Generate Custom AI Images In CapCut Desktop
Step 1: Describe Your Vision
Open CapCut Desktop and open the workspace. After clicking on the AI Media on the left panel, select AI Image. And it is here that your creative process starts. Enter in the box what you wish to generate. The more you describe, the clearer the results are. Considering the example of typing in a luxury car parked next to a modern villa in the sunset lighting will yield more accurate visuals as compared to a short and broad phrase.
In case you already have a picture in your desired tone or layout, post it as a reference picture. This assists the AI in knowing your vision better and makes sure the end product is presented according to your style.
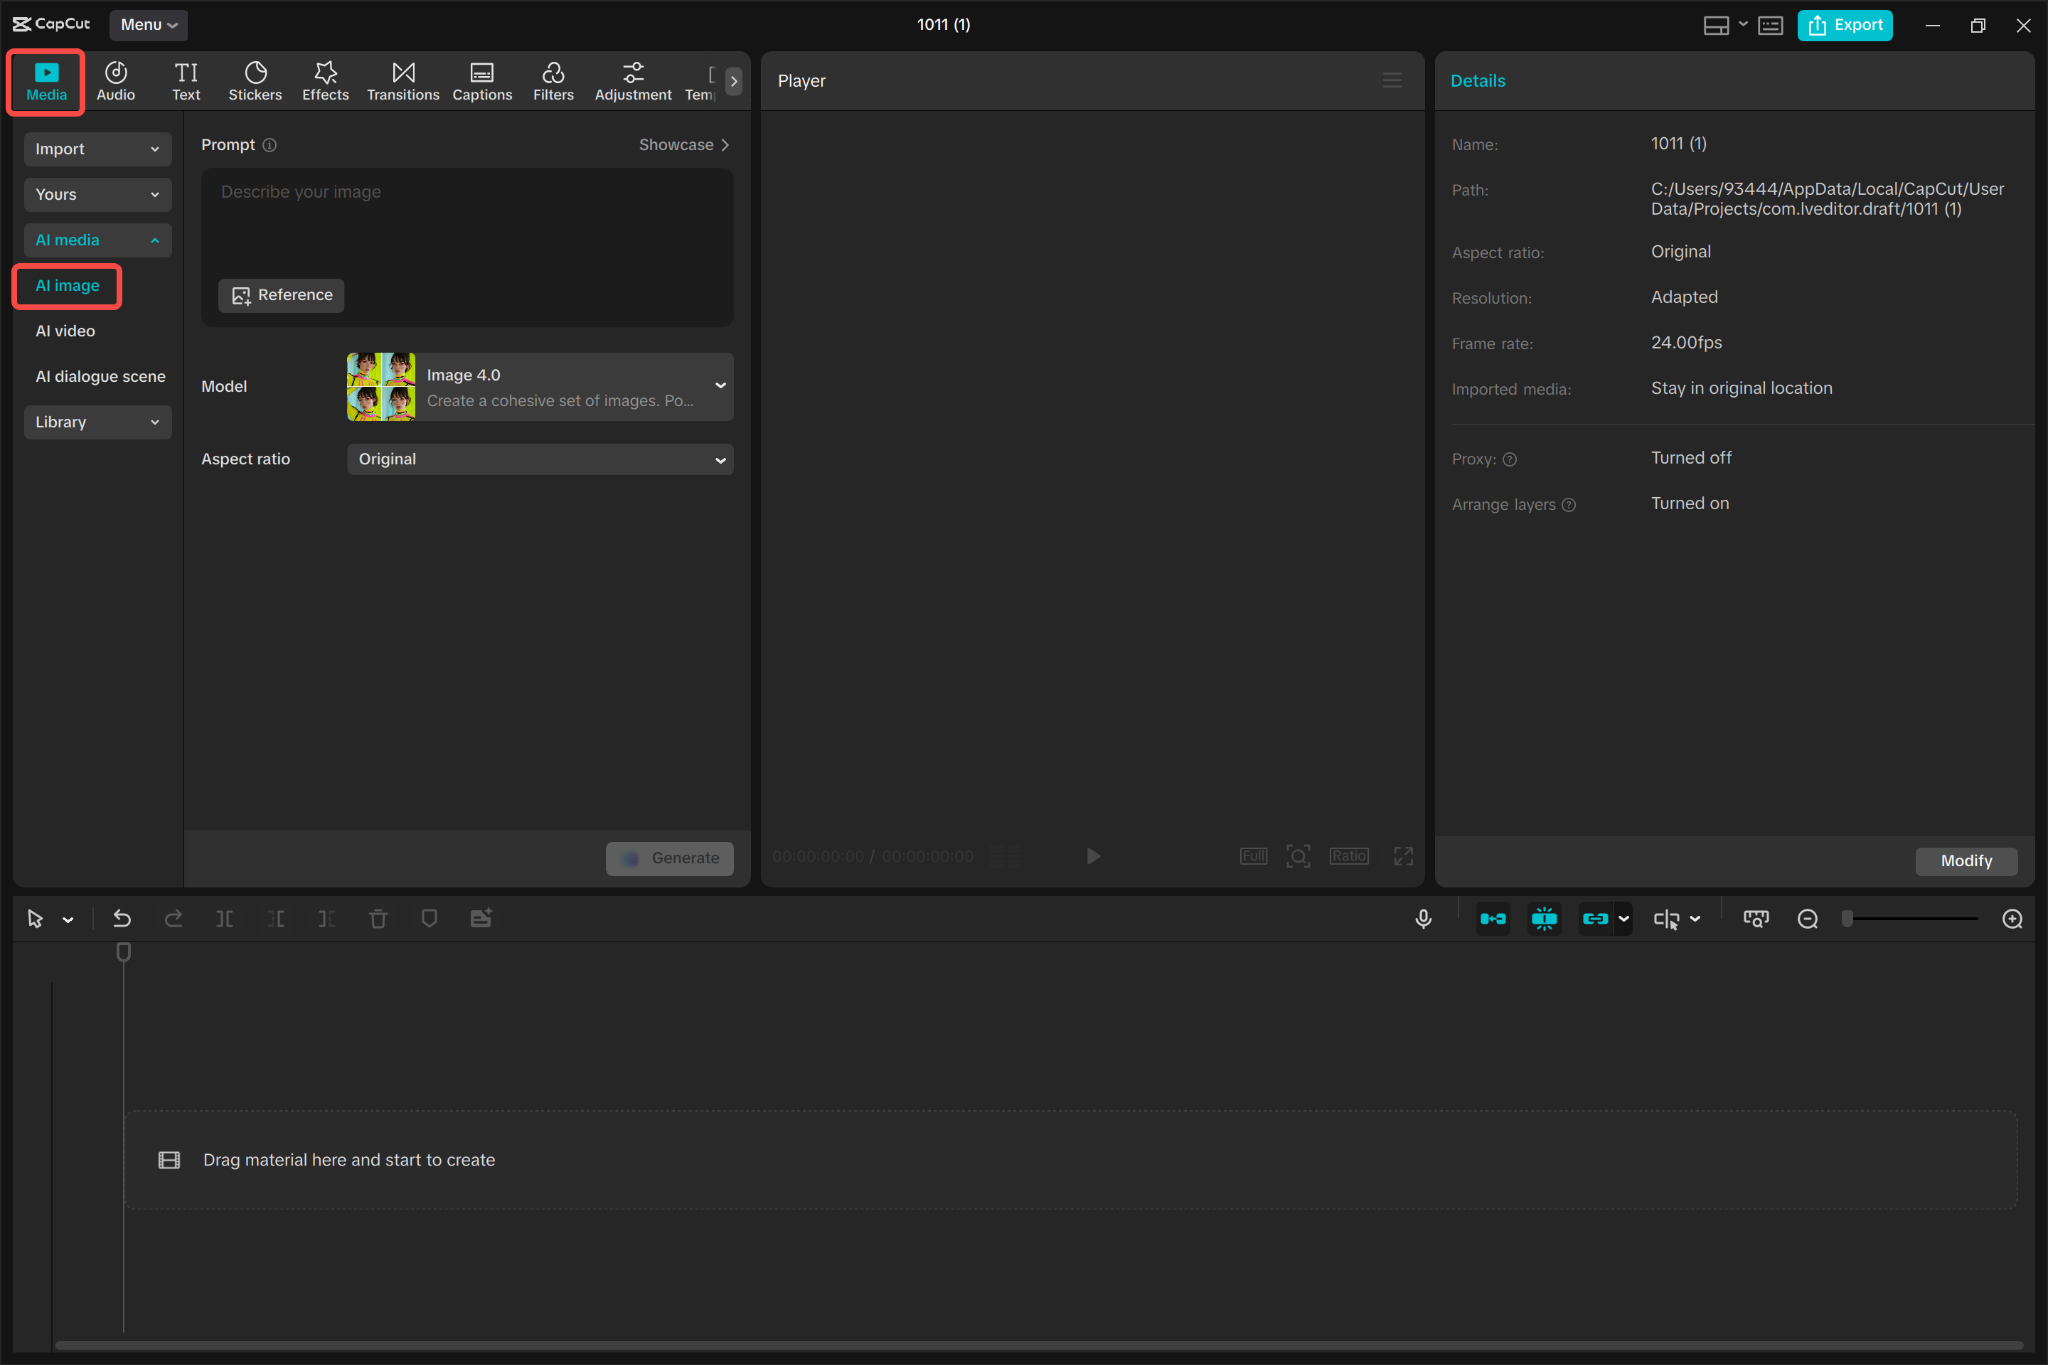
IMAGE: CAPCUT
Step 2: Select A Model And Aspect Ratio
Now it is time to select the aspect ratio and AI model after typing your prompt. Image 4.0 (Powered by Seedream 4.0), 3.1, 3.0, or 2.0 Pro are some of the models available in the dropdown menu. The result of each of the models is different; say, Image 4.0 is productive to hyper-realistic, whereas Image 3.1 is productive to artistic designs.
Then pick a desired aspect ratio depending on may the image will be used. A 9:16 design best fits TikTok or Instagram Reels, 16:9 is the most outstanding on YouTube thumbnails and any other project in the widescreen, and 1:1 is suitable in social media posts. The ability to select the appropriate ratio has you making sure that your picture appears beautiful on your preferred platform.
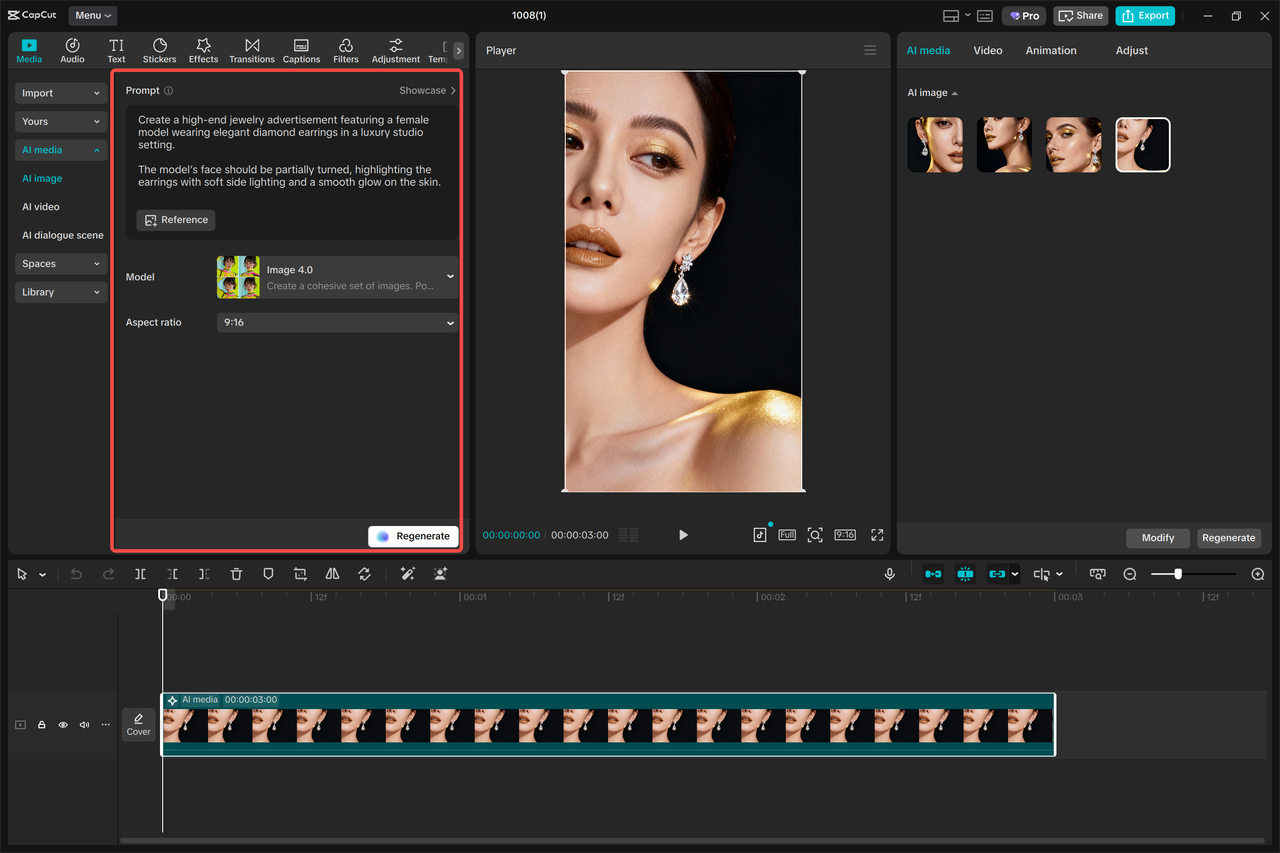
IMAGE: CAPCUT
Step 3: Generate And Refine
When all is ready, press the “Generate” button. The AI of CapCut will study your prompt, and within several seconds, it will produce four possible outcomes. After preparing your pictures, go through each of them and select the best one.
Once you have chosen the perfect picture, you can edit it by using the built-in editing features of CapCut. Tilter brightness and contrast to adjust lighting, switch between filters and/or saturation to adjust mood, and crop or resize to perfect composition. You are even allowed to add stickers, overlays, or texts to customize your image.
To animate your creation, go to a three-dot menu and choose Image to Video. This will turn your still image into a short moving video, which you can later enhance with background music, transitions, or text.
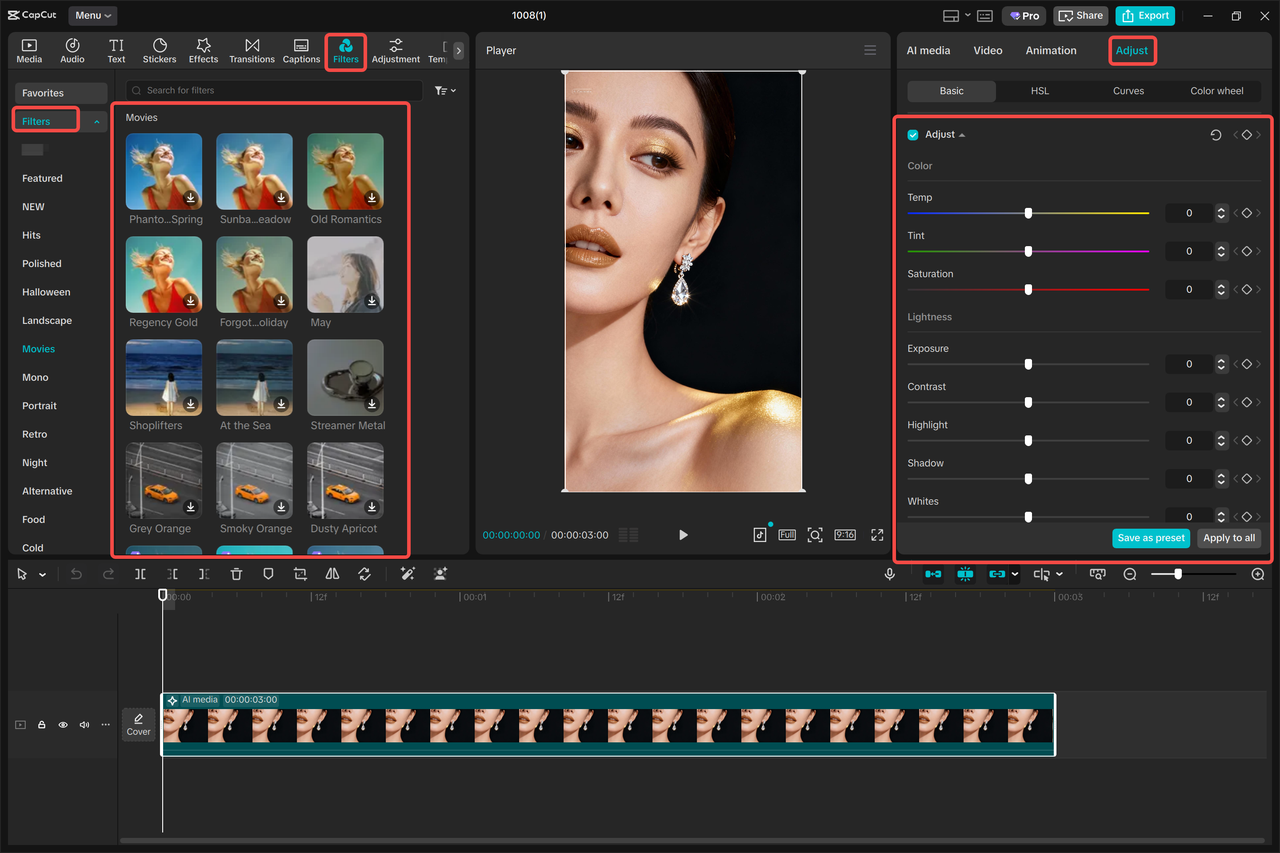
IMAGE: CAPCUT
Step 4: Download And Share
When your image is precisely the way you want, then you need to export it. After the editing panel, the menu above can be used to select Export Still Frames (3 lines). Choose your file type (PNG or JPG) and file resolution – CapCut can use up to 8K and achieve very sharp output. Then, select the option of exporting your image.
Your artificial intelligence-created work is now ready. You can share it on social media, promote your marketing efforts with it, or add it to your video projects, all in just a few clicks and without having much difficulty with CapCut Desktop.
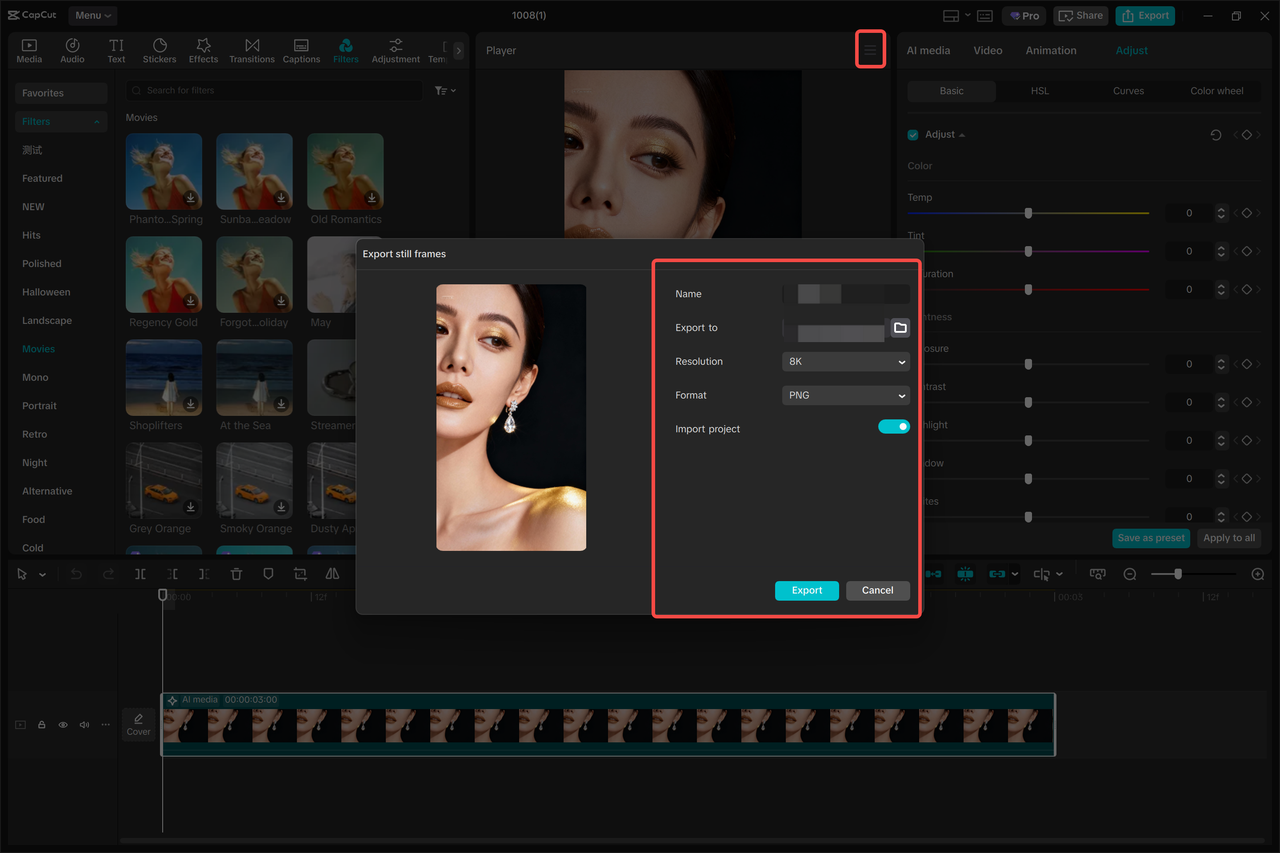
IMAGE: CAPCUT
Final Thoughts
The AI image generator of CapCut Desktop is a new method of generating personalized images without much effort. The process is very easy and quick. Just go on describing your idea, pick a model, create, and polish until the final version. CapCut enables you to expand flat concepts into motion with the possibility of creating professional-quality graphics with the addition of such tools as background remover.
CapCut Desktop will be the ideal tool of choice if you want to make gorgeous AI-generated content without having to use complicated tools or a steep learning curve. It is time to start exploring now and create with your imagination, one AI image at a time.
COMMENTS