Cars age in two ways now: metal and mechanics, and then the invisible clockwork of software. When the in-car interface starts to lag and map updates cost a premium, the result is a user experience that feels both needlessly expensive and instantly outdated. That is the pressure that drove a maker to build a Lego Navigation System for a nine year old car, piece by piece, iteration by iteration.
The real significance here is not that a phone can be parked on a dash with bricks. What actually determines whether this matters is the design choice between adding automated complexity and committing to elegant mechanical simplicity. The project reveals that small constraints, like a three stud maximum thickness or a phone that does not support wireless charging, define which solutions are viable.
From a stripped down static dock that held a phone securely for a year, to an automated Bluetooth motor that tried to plug in a cable, to a final minimalist mechanism that clips and charges without electronics, each version taught a practical lesson. People often misinterpret these builds as novelty; the lesson worth noticing is about robustness, margin for error, and the real costs of adding electronics into a cramped dash.
What follows is an editorial walk through the decisions, the quantitative constraints, and the tradeoffs that made the final Lego Navigation System both useful and believable as a daily travel solution. The maker kept one explicit rule: build from parts on hand. The result cost precisely nothing in cash yet cost hours of design and testing. The decisions offer a useful template for anyone thinking of turning a phone into a car head unit.
Why A Phone Is The Smart Infotainment Choice
Phone-based infotainment provides an easy path to current navigation and apps while avoiding expensive head unit upgrades. For drivers in older cars, a phone keeps maps and UI fresh without installing new hardware in the dash. The tradeoffs are physical: finding a mount that preserves sightlines, looks acceptable, and reliably supplies power.
Upgrade cycles for phone hardware and software are measured in months. Car infotainment updates are measured in bills. In the builder’s case the car offered map updates twice a year at a price of about €130 each, which is nearly €260 a year to keep maps current. That financial friction is the explicit motivation for switching to a phone-centered approach.
Beyond cost, phones are portable, familiar, and easy to update. The speaker observed that even a nine year old vehicle can feel worse off than some newer cars because the head unit lags for the simplest tasks. The implication is clear: for many drivers the phone is the modular upgrade path that keeps the car current without swapping hardware.
There are tradeoffs. Using a phone requires a mounting solution that does not obstruct view, does not feel tacky, and can reliably provide power for long drives. That is where the physical design problem lives: aesthetics, visibility, and charging reliability are the constraints that define acceptable mounts.
What The Lego Navigation System Is
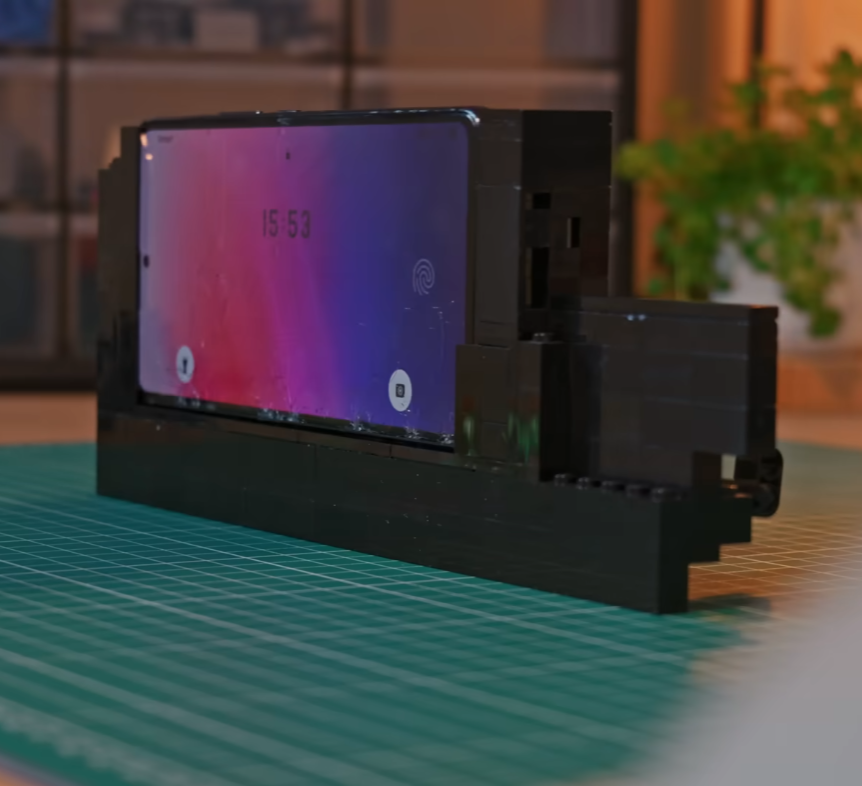
The Lego Navigation System is a DIY phone dock built from spare bricks and off-the-shelf small motors, iterated to solve charging, fit, and repeatability problems. It is a prototype class build that tests whether a phone-first approach can be both practical for long trips and simple enough to maintain without custom parts.
Iteration One: A Simple Dock That Actually Worked
A successful first build proves the core idea: a phone can be held securely using clever anchoring and existing car geometry. The simplest dock removed many failure modes because it avoided added power systems and kept the interaction purely mechanical and predictable.
The first design began as a straightforward dock placed in an empty pocket above a small ridge on the dashboard. The builder leveraged a vent lock trick: an L shaped brick tucked into the air vent and then rotated to lock the dock in place. It is a pragmatic anchoring idea that uses existing car geometry rather than clamps that obscure sightlines.
Functionally this dock was solid. It held the phone reliably for about a year of use, which is a meaningful run for a DIY solution. The single glaring omission was charging: without wireless charging on the phone, the dock could not support continuous navigation on long trips.
Iteration Two: When Automation Promised Too Much
Automation can feel like an elegant solution to a practical problem, but it can also multiply points of failure. Attempting to motorize cable insertion introduced battery, connection, and calibration demands that turned simple docking into a multi-step ritual prone to occasional failure.
The second iteration tried to solve charging with automation. The plan was elegant on paper: use a Bluetooth motor to translate rotary motion into linear motion and guide a USB-C cable into the phone automatically. The constraints arrived quickly and brutally.
First, there was a strict size limit. Anything thicker than three studs would not fit on the dashboard ridge while keeping sightlines and aesthetics intact. That narrow slot forced the builder to use a non-official, physically smaller motor. That motor introduced a new mechanical inconsistency: its axle hole was shallower than the official parts, so the connected axle protruded and interfered with the gear train.
Mechanical Limits And The Small Motor
To make the smaller motor work, the builder resorted to sanding down an axle until it fit. It is a vivid example of a tradeoff: using a smaller component gains form factor, but it may introduce tolerances that require modification. The modification fixed the fit but also exposed another class of constraint, which is maintenance of modified parts under repeated cycles.
Automation Versus Latency And Power
Calibration turned into a second problem. The motor was intended to rotate 180 degrees for each plug or unplug cycle, but resistance from the cable and the dock structure corrupted the neat calibration. Because the motor needed to run at maximal rpm to overcome friction, the software strategy leaned on a brute force switch instead of fine position control.
On the software side the builder created a touch macro on the phone to open the motor app, connect via Bluetooth, and run the motor automatically whenever driving mode activated. It is a clever integration, but it introduced new constraints: the motor required its own battery pack to be charged and turned on before starting a trip; the Bluetooth connection and macro added seconds of latency before charging would begin; and the motorized plugging action proved unreliable in the field.
After a week of regular use the automated solution showed its limits. The boat anchor was not the code or the creative hack, but operational needs: a charged battery pack that had to be turned on, occasionally loose connections that resulted in no charging, and an unpredictable mechanical action that sometimes left the cable only partially seated. For a system intended to make life easier, these travel frictions became unacceptable.
Road Testing: What Two Weeks On The Road Revealed
Real-world trips expose the cumulative cost of tiny failures. On a long drive, the number of docking cycles multiplies small annoyances into a persistent irritation. Road testing showed which defects were tolerable and which demanded redesign.
The third version aimed at getting roadworthy for a two week European road trip. Aesthetic tweaks first: mismatched pieces were swapped for black counterparts to make the build blend with the dash. That attention to visual integration matters because a solution that looks clumsy will be tolerated less by the driver.
On the road the dock did what a dock is supposed to do: it kept the phone secure while navigating some of the best driving roads in the world. That is a crucial validation point. But docking and undocking turned into repetitive micro-frustrations. Nearly every time the phone was placed in the dock the user had to help push the cable in to ensure a full seat. Undocking was rough on both the phone and the dock, leading to chipped bricks and a battered USB-C connector.
Why Robustness Beats Complexity
What becomes obvious when you look closer is that the frequency of interactions magnifies small flaws. A design that requires a nudge every time the phone is docked multiplies that nudge across dozens of interactions on a long trip. The moment this design breaks down is not when the phone is secured mid-drive; it is during repeated docking cycles where the stress concentrates.
That lesson reframed the approach: if a mount is meant to be used daily and across long trips, mechanical predictability and serviceability are more valuable than a clever automated flourish that only works intermittently.
Final Design: Minimal Mechanics, Maximum Reliability
Stripping away automation did not feel like a loss because it removed failure points. The final design emphasizes a consistent manual flow and a cable path that secures itself when the phone is seated, eliminating the need for motors, batteries, or Bluetooth macros.
The final iteration embraced deliberate simplicity. Rather than trying to automate the plug, the builder redesigned the cable path and changed the clip geometry so that the cable sits flush and cannot move even slightly. The charging action became a manual, mechanical gesture initiated by one button press, with a one handed undock motion that uses the pinky to release the top latch.
The new flow is intentionally tactile: slide the phone in from the top, press the right side button to secure and charge, and when finished push the top release with the pinky to disconnect and slide out. Those motions are short, discrete, and repeatable. The design removes whole classes of failure modes introduced by motors, Bluetooth, and battery packs.
How The Dock Works Mechanically
The mechanism relies on clip geometry and a constrained cable channel so the phone both aligns and compresses the cable into the connector when seated. This passive system ensures that the act of docking performs the charging action without additional actuators or power sources.
The tradeoff here is explicit. The project gives up the novelty of automatic plugging for repeatable reliability that survives repeated cycles. Time investment shifted, too: the final build required many hours of refinement to shave bulk and optimize the clip geometry. The quantified constraint that drove the entire project stayed present: the mechanism had to remain within a three stud profile to fit the dash elegantly.
A practical constraint that influenced choice of parts was cost in cash. Because the creator only used bricks on hand, the build’s material cost was precisely zero. That is not the same as being free of effort. The labor cost was measurable in hours of iteration, sanding, testing on a two week trip, and then more refinement.
Automation Vs Mechanical Simplicity
Automation can remove manual steps, but it adds power, calibration, and connectivity needs that change the user equation. Mechanical simplicity preserves predictable maintenance, minimal parts, and a lower chance of mid-trip failure. The choice depends on whether you value novelty or endurance on long drives.
In this project the automated solution required its own battery, Bluetooth pairing, and precise calibration while offering a convenience that only sometimes worked. The manual mechanical approach required design effort up front but delivered consistent, repeatable performance with no external power or setup before each journey.
Lego Dock Vs Commercial Phone Mounts
Comparing a Lego-built dock to off-the-shelf mounts highlights practical decision factors: cost, customization, aesthetic integration, and repairability. A Lego dock is free and highly adaptable; commercial mounts trade those benefits for polished finish, tested durability, and warranty support.
For many drivers the question is not whether a DIY dock can hold a phone, but whether the tradeoff of time for customization is worthwhile compared to buying a tested product. The Lego route offers extreme customization and repairability; a store-bought mount reduces build time and supply chain uncertainty.
Design Constraints And Key Considerations
Successful phone-first infotainment depends on a few predictable constraints: dashboard form factor, connector reliability, and the operational cost of added electronics. Identifying these early narrows viable options and prevents wasted iterations.
Two concrete constraints to keep in mind when attempting your own build: the physical envelope of your dashboard will limit component choices, sometimes down to a single stud or a three stud thickness, and adding electronics usually carries energy and connectivity costs. In this case the motor needed a charged battery pack that must be turned on before departure, and the Bluetooth macro introduced connection latency measured in several seconds. Those are not fatal flaws, but they are operational overheads that change the user equation.
Who This Is For And Who This Is Not For
This project is best for tinkerers who value customization, repairability, and low cash cost, and who are willing to invest design hours to shave tolerances and optimize mechanical fit. It suits drivers of older cars who want a phone-first infotainment path without replacing the head unit.
This approach is not for someone who prefers out-of-the-box reliability, professional finishes, or plug-and-play simplicity. If you need warranty-backed durability, commercial mounts or professional installation are better choices.
Next Steps And Patterns Worth Codifying
The build suggests a short playbook would be useful: standard clip geometry, dash-friendly widths, and a checklist for when to add electronics versus when to optimize mechanics. Codifying these patterns would help the idea scale beyond a single charming one-off.
Where does this idea go next? A natural direction is to codify repeatable patterns: standard clip geometry, a library of dash-friendly widths, and a checklist for when to add electronics versus when to optimize mechanics. Those artifacts would turn a single successful build into a small playbook for anyone who wants a phone-first infotainment path in a vehicle that is otherwise fast approaching digital obsolescence.
FAQ
What Is The Lego Navigation System?
The Lego Navigation System is a DIY phone dock built from spare Lego bricks and a small motor in early iterations; it evolved into a minimal mechanical clip that secures and charges a phone without motors or extra batteries.
How Does The Lego Dock Charge A Phone?
The final design routes the cable so that seating the phone compresses the connector into place. Charging is a passive mechanical result of the dock geometry rather than an automated plugging action.
Is A Motorized Dock Better Than A Manual Dock?
Not necessarily. Motorized docks reduce a manual step but add power, pairing, and calibration needs that can introduce more failures than they solve, especially on long trips.
Can I Build This Without Special Parts?
Yes. The maker used only bricks on hand for the final version, so material cash cost was zero. Some iterations did use a small non-official motor, but the durable daily solution relied on mechanics alone.
Does The Dock Work On Every Dashboard?
It depends on the dashboard form factor and the available envelope. A key constraint is thickness; this design focused on a three stud maximum profile. Measure your dash before assuming compatibility.
What Are The Main Tradeoffs To Consider?
Tradeoffs include time versus money, automation versus reliability, and customization versus finish. Add electronics only if their operational cost is justified by the convenience gained.
Can The Same Principles Be Applied To 3D Printing Or CNC?
Yes. The editorial argues that the principles of form factor, durability, and minimizing electronic overhead apply equally to 3D printing, CNC, or woodworking approaches.
Is There Anything Uncertain About The Project?
Specific compatibility with every phone model and every dashboard cannot be guaranteed from the single-builder account. Readers should treat measurements and parts choices as starting points and test prototypes against their own vehicle geometry.
COMMENTS