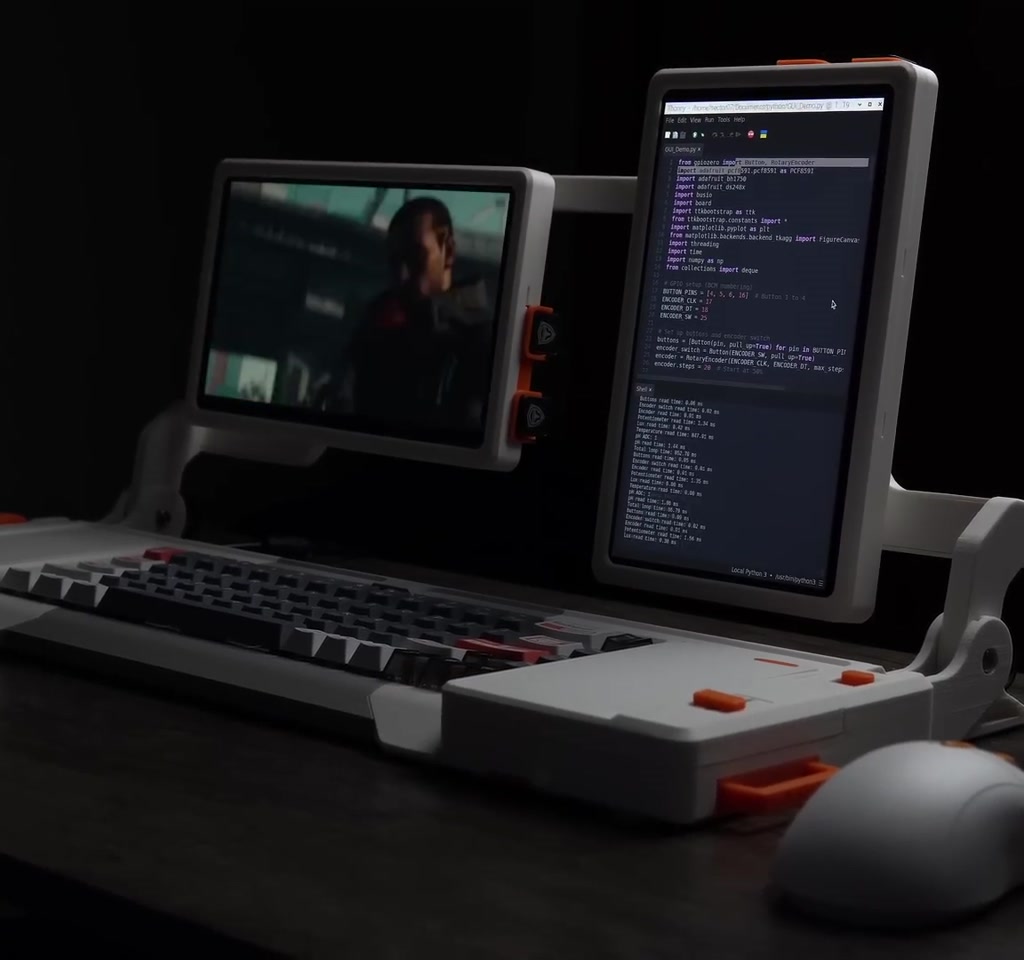
Raspberry Pi Cyberdeck builds have become a shorthand for maker ambition: portable, futuristic, and deeply personal. This project pushes that shorthand into something practical, pairing dual screens, a mechanical keyboard, and a suite of sensors inside a fully 3D printable enclosure.
The real significance here is not the visual retro-future styling. What changes how the idea should be understood are the engineering tradeoffs required to make a cyberdeck that is both usable and serviceable. That balance determines whether a build becomes an everyday tool or a weekend novelty.
What actually determines whether this matters is the willingness to accept certain constraints: sub-millimeter snap-fit tolerances, low-run PCB costs and assembly time, and a learning curve for small-pad soldering and connector troubleshooting. Those are the thresholds that dictate whether the concept scales from prototype to repeatable project.
This article walks through the decisions, the moments that required rework, and the pockets of design that open practical capabilities like removable Raspberry Pi access, i2C sensor chains, and dual portrait/landscape screens.
What Is A Raspberry Pi Cyberdeck
A Raspberry Pi cyberdeck is a compact, portable system built around a Raspberry Pi that combines input controls, display(s), and sensors inside a custom enclosure. It is less a single device and more an assembly approach that prioritizes portability, customization, and hands-on maintenance over turnkey convenience.
Design And 3D Printing Workflow
Planning The Parts And The Look
The build begins in 3D modeling, laying out every PCB, cable, hinge, and key. The project was intended to be fully 3D printable and easy to assemble while keeping a retro-futuristic aesthetic. That requirement pushed the designer toward integrated snap-fit features rather than metal fasteners for most seams.
How The 3D Printable Workflow Works
Model each component with assembly tolerances in mind, print test pieces, and revise. Iteration focuses on functional interfaces such as hinge pins, cable channels, and snap-fit clips. The workflow rewards incremental prints and targeted adjustments rather than attempting a single perfect prototype.
Snap Fit Tolerances And Iteration
Snap-fit engineering was one of the hardest practical problems. The parts had to press together by hand but still hold under use. Getting that right meant printing many small test pieces and tweaking dimensions on a sub-millimeter scale.
Quantified context: tuning those fits took multiple iterations and dozens of printed test runs, and the full set of final prints required tens of hours of print time before a single assembly test. The time investment is a measurable constraint for anyone copying the design.
Electronics And Custom PCBs
Why Three Boards And A Ribbon Cable
Instead of relying on off-the-shelf HATs, the design uses three custom PCBs. One board plugs directly into the Raspberry Pi, a center board handles power distribution and button routing, and an external board brings GPIO to the outside world. A 40-pin FPC ribbon links them so signals and power flow in a single neat channel.
This split increases modularity: external sensors or shields can attach without tearing the whole deck apart. The tradeoff is additional fabrication and assembly complexity.
Fabrication, Costs, And The Sponsor Role
To make the PCBs, the creator used KiCad for design and then ordered boards through PCBWay, which handles fabrication and can offer design help. For small runs, PCB manufacturing and basic assembly often land in the range of tens to low hundreds of dollars depending on layer count, finish, and any assembly services requested.
That cost framing is important because cheap 3D printing does not remove the reality that electronics fabrication and careful hand soldering carry recurring time and expense.
Soldering, Assembly, And Troubleshooting
Small Pads, Long Nights
Soldering the boards revealed what many makers fear most: very small pads that require steady hands and patient inspection. Verifying continuity with GPIO extender boards made the difference between guessing and diagnosing real shorts.
One concrete, verifiable diagnosis from the project: a voltage trace intended to supply a MOSFET was effectively dropped to near zero because two resistors were swapped. One was a 10 ohm and the other a 10k ohm, and swapping them changed the expected voltage drop across the net.
Connector Failures And Rework Time
After fixing the resistor placement, the build still would not boot because a shorted quick connector blocked the boot sequence. The short required replacing the connector, after which the system powered normally.
Quantified context: rework, including desoldering and connector replacement, can add hours to the assembly timeline. For hobbyists that means a single bad joint or misplaced component can easily increase assembly time by 50 percent or more.
Mechanical Design That Tries To Be Practical
Dual Screens And Rotation Mechanics
The two screens rotate independently between portrait and landscape. Internal pins limit over-rotation and a secondary mechanism prevents cable strain. Those choices protect fragile ribbon cables but require careful alignment during assembly.
That alignment tolerance again echoes the same theme: optical or mechanical polish requires more time in iteration and test prints.
Removable Raspberry Pi And Serviceability
One deliberate design decision was a quick-eject system for the Raspberry Pi. The idea is to let a developer program or test the Pi with keyboard and mouse installed, then slide it out for deployment elsewhere. The tradeoff is enclosure tightness. Space savings inside the case makes extraction fiddly, so ease of removal suffered in favor of compactness.
This is a clear condition that potential builders must weigh: compact internal packaging versus tool-free access for maintenance.
Inputs, Sensors, And A Simple Lab Demo
Sensor Suite And Local Feedback
The deck exposes a linear slider, four programmable buttons, a rotary encoder with push, and an auxiliary USB port. There is also a quick connector for Adafruit i2C sensors and an external GPIO header for standard Raspberry Pi shields.
Sensor Fusion Demo And What It Shows
To demonstrate capability, the creator chained a lux sensor, a temperature probe, and a pH meter into a small experiment. With room temperature water, the lux reading barely changed and the pH sat near neutral. Pour in hot coffee and the temperature rises, light transmission drops, and pH falls as the liquid becomes acidic. The demo shows how sensor fusion can be run locally on the Pi for immediate, visual feedback.
Two Core Constraints That Define Usefulness
Constraint one is mechanical tolerance versus assembly simplicity. A fully 3D printable shell with snap fits reduces parts and fasteners, but it forces sub-millimeter precision. That increases print and iteration time, and it can make field repairs harder. In this build, getting snap fits right cost weeks of iteration and tens of hours of print time.
Constraint two is electronics complexity versus user accessibility. Custom PCBs and small SMD pads make a compact, clean internal layout possible, but they raise the bar for assembly skill and for troubleshooting. Minor mistakes like swapped resistors or a shorted connector introduced hours of debugging and replacement parts. Fabrication and rework costs tend to shift into tens to low hundreds of dollars for small batches.
What Becomes Obvious When You Look Closer
What becomes obvious when you look closer is that the cyberdeck is as much an exercise in constraint management as it is in aesthetics. Every design choice unlocks a capability and introduces a boundary. Choosing dual screens and a removable Pi opens use cases but tightens tolerance budgets.
The moment this breaks down is rarely dramatic. It is a cable pinched at a hinge or a swapped resistor that drops a rail. These are fixable, but they mark the difference between a one-off maker artifact and a repeatable kit other people can build without bespoke troubleshooting skills.
Raspberry Pi Cyberdeck Vs Off-The-Shelf Portable Devices
Compared to commercial portable devices, a 3D printed Raspberry Pi cyberdeck emphasizes customization, repairability, and sensor integration over polished user experience and guaranteed reliability. The tradeoffs include higher build time, a steeper assembly curve, and variable repeatability depending on print and soldering skills.
That comparison is not a verdict. It is a decision frame: choose a cyberdeck to control hardware and experiment with sensors, or choose a consumer device for consistent out-of-the-box performance.
How To Decide If This Build Is Right For You
Start by deciding which constraints you will accept. If compactness and integrated design are top priorities, expect more iteration and occasional rework. If easy maintenance and faster assembly matter more, accept larger internal volumes and common connectors instead of tiny SMD parts.
There is an unresolved tension between community adoption and design ambition: making a build that is both compact and easy for others to reproduce requires design compromises that some creators will resist. Addressing that tension means explicit tradeoffs in documentation, parts selection, and modularity.
Who This Is For And Who This Is Not For
Who This Is For: Makers and developers who value customization, sensor integration, and hands-on learning. People who want a portable, modifiable platform for experiments and who accept iteration as part of the process.
Who This Is Not For: Users who need a ready-to-use portable computer with minimal setup, or those who lack access to small-run PCB services or SMD soldering tools. If you want guaranteed repeatability with zero debugging, a commercial device is the safer choice.
Next Steps And Where To Look
A copyable parts list and full documentation were shared by the creator on a public GitHub repository, which is essential for anyone who wants to reproduce the build or adapt it to alternate sensors and peripherals. Community forks will likely address repeatability and kit packaging over time.
Looking ahead, the design points toward modular, 3D printable shells combined with low-cost PCB fabrication to create genuinely portable labs. The open question is how to make those labs community-friendly without diluting the experimental potential that makes cyberdecks interesting.
FAQ
What Is A Raspberry Pi Cyberdeck?
A Raspberry Pi cyberdeck is a custom, portable device built around a Raspberry Pi that integrates displays, input controls, and sensors inside a bespoke enclosure for experimentation and field use.
How Does A 3D Printable Cyberdeck Work?
It combines 3D printed mechanical parts with custom PCBs and off-the-shelf modules, using careful modeling, test prints, and iterative assembly to achieve functional tolerances and integrated features.
Is Dual Screen Worth The Added Complexity?
Dual screens enable orientation flexibility and multitasking, but they increase mechanical and cable alignment complexity. Whether it is worth it depends on your use case and tolerance for extra iteration.
Can Beginners Build This Project?
Beginners can attempt it if they are ready to learn PCB assembly and small-pad soldering, and if they accept added iteration time. The project assumes familiarity with basic electronics and 3D printing workflows.
How Much Do Custom PCBs Cost For A Small Run?
For small runs, fabrication and basic assembly often land in the tens to low hundreds of dollars, depending on layer count, finish, and any assembly services requested. Exact costs vary by vendor and options selected.
What Tools And Skills Are Required?
Required tools include a 3D printer, soldering equipment suitable for small SMD pads, basic hand tools for assembly and rework, and familiarity with PCB design tools if you plan to modify boards.
Where Can I Find The Parts List And Documentation?
The creator published a copyable parts list and full documentation on a public GitHub repository. Check the project repository for BOMs, KiCad files, and assembly notes.
Does This Design Scale Into A Kit For Others?
Scaling into a kit is possible but requires addressing tolerances, documentation quality, and parts sourcing to reduce bespoke troubleshooting. The project highlights this challenge rather than claiming it has been fully solved.
COMMENTS