YouTube is one of the most popular video platform and it gets over 30 million visitors every day. Thus more and more people would promote or share their experiences on YouTube. However, to make a video for YouTube is not easy, especially to create a video ranking high on YouTube. You’ll learn how to edit a YouTube video no matter it has been published or not.
IMAGE: PEXELS
If The Video Has Been Published
When you find some mistakes in the uploaded video on YouTube, you can edit it with some simple features: trim, blur, add audio. To enhance the YouTube video that was published, please try with the following tips.
Step 1. Move to your YouTube channel and log in your YouTube account.
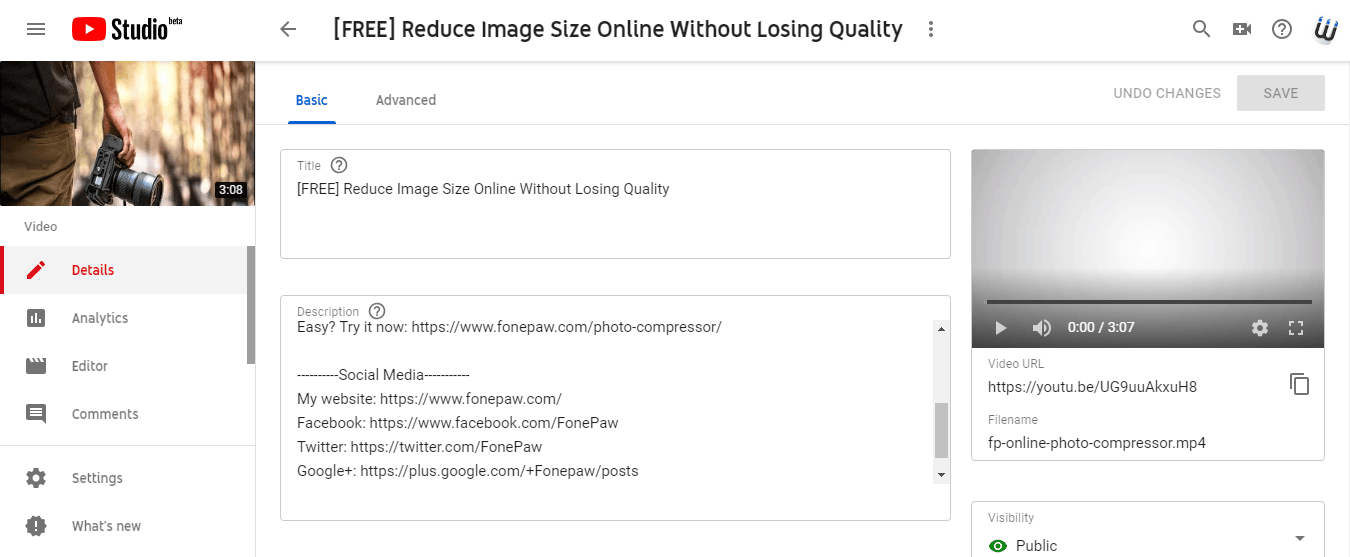
Step 2. Select the video that you tend to edit. In the playback page, click EDIT VIDEO button to modify some details. The Basic and Advanced information can be re-written as you like. For instance, the title, description, visibility, tag, thumbnail, playlists, and some settings can be modified.
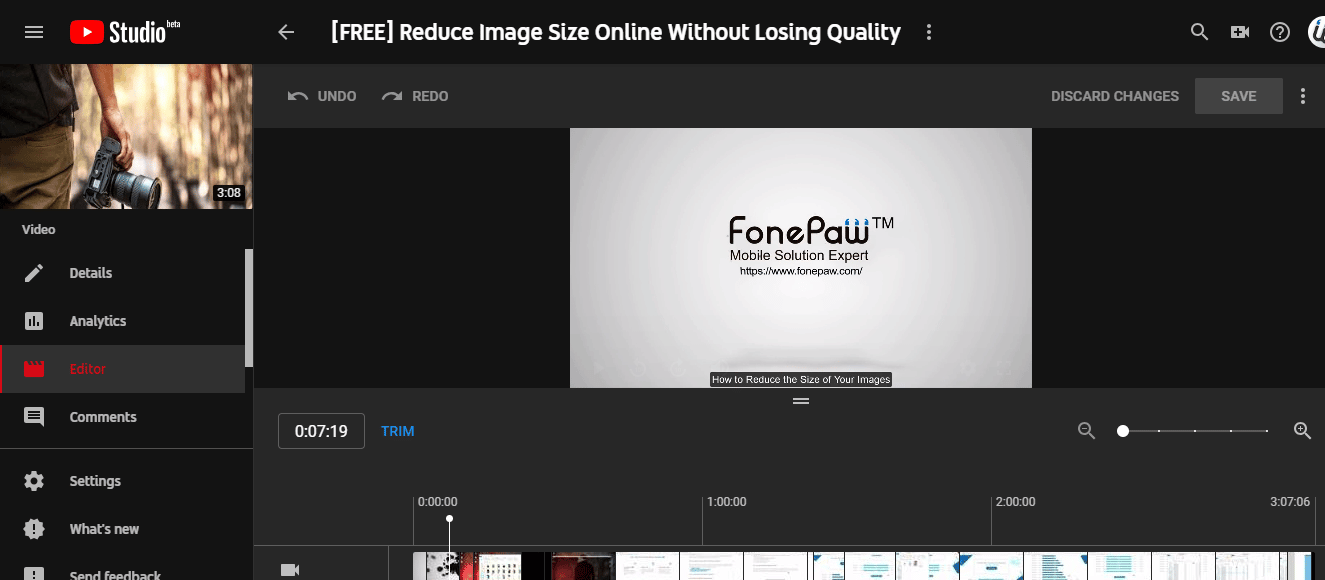
Step 3. If you are not satisfied with the video itself, hit Editor option on the left sidebar. Now, you are in the video editor for YouTube. You’re able to do with the given features in YouTube studio.
- Trim the video and remove the unwanted clips which can be selected with splitting the beginning and ending section of the video.
- Add audio to the video in the audio track.
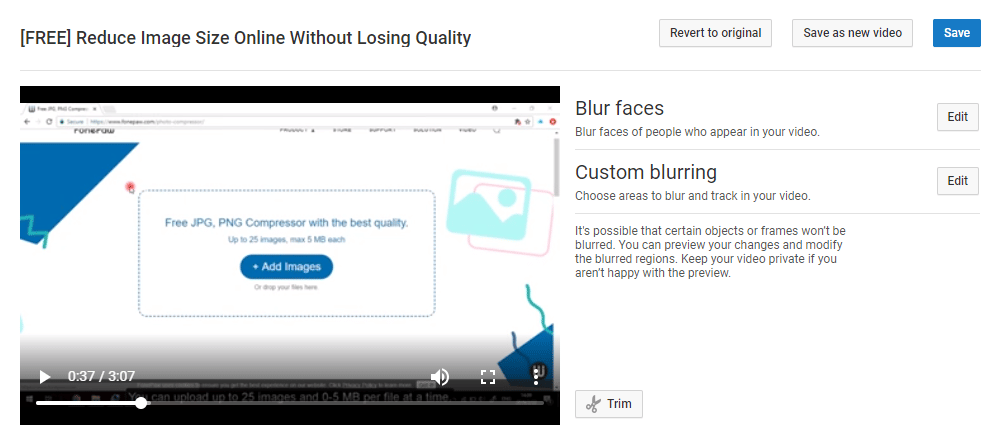
- Add blur to the video with blur faces of people and customizing blur area.
- Zoom in and out the timeline.
- Add an end screen to the video.
Step 4. After editing, click Save. The video will go processing.
Then the video would appear on your channel without mistakes or unneeded sections. It is very simple to edit a published video on YouTube. However, since the feature in YouTube video editor is limited, please double check your video before uploading to minimize the disruptions.
If The Video Hasn’t Uploaded To Youtube
Before you upload your video to YouTube channel, if you notice something wrong on your video, you are lucky and you can modify it with lots of tools that would own more practical features than YouTube video editor. At this time, you can use PawEditor to edit the video for a better one.
What Can Paweditor Do For Video Editing?
- Cut the video into multiple clips. Then you can delete clips or merge some into one.
- Separate audio from video. In addition, it’s possible to mute the video or volume up/down.
- Speed up some clips. The speed of the video can be customized with 2x,3x and even 10x, 100x.
- Rotate the video to suitable position.
- Add subtitle or annotate to the video so that the audience will better understand the content.
- Insert the transition mode between two clips so that the video will move smoothly. More than 20 templates can be chosen or you can customize animations with key-frame.
- Effects will make your video appealing. Wave, mirror, noise remover, and more can be applied.
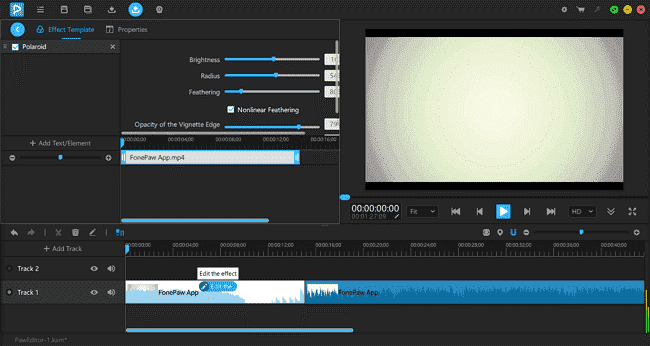
- Change the tone of the scene with filters. Various kinds of filter are for you to optimize your video style: warm/cool color, Polaroid, Monotone, etc.
- Many minor features are waiting for you to discover.
How To Edit A Video For Youtube With Paweditor?
Step 1. Create a project and add files (videos, images, audios) to library in PawEditor.
Step 2. Drag files to the corresponding tracks (video and audio track).
Step 3. Edit the video or audio with the features above. Please pay attention to the length of the video since YouTube would be more keen on videos with more than 3 minutes.
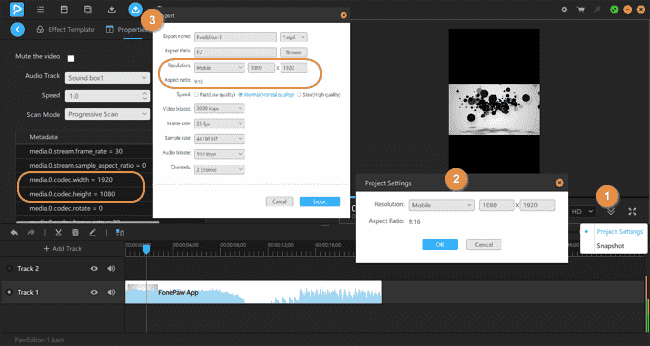
Step 4. Export your video. In this step, please customize some settings: format, resolution, path, etc. MP4 is the generally-selected one. 16:9 is the recommended aspect ratio for YouTube and 1920*1080 is suggested.
Step5. Upload your video to YouTube.
Now, you can get started to edit your video for YouTube. Select the suitable method to optimize your stunning YouTube movie and share your experience with us.
If you are interested in even more social media-related articles and information from us here at Bit Rebels, then we have a lot to choose from.
COMMENTS